How To Create Bootable USB Drive For Windows 11 With Rufus

Xploit Machine

Well-known member
Joined
Nov 29, 2022
Messages
1,244
Reaction score
104
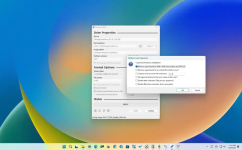
Rufus lets you download the ISO file and create a bootable USB flash drive to install Windows 11 on supported and unsupported hardware. Rufus is a free tool to quickly create a bootable USB flash drive to upgrade or clean install Windows 11. The utility works similarly to the Media Creation Tool, and you can provide an existing ISO file or download the files directly from the Microsoft servers. Unlike the Microsoft solution, Rufus not only allows you to create a USB installation media, but it completes the process faster. You can prepare a USB drive for Windows 11 22H2, 21H2, and even older versions like Windows 10 and 8.1. Also, the tool can create a bootable USB that bypasses the security and memory requirements to install the operating system on unsupported hardware.

In this guide, you will learn the steps to use Rufus to download the ISO file and create a bootable media to install Windows 11 (versions 21H2, 22H2, 23H2, and higher) from scratch.​

1718603922824.png
 

Xploit Machine

Well-known member
Joined
Nov 29, 2022
Messages
1,244
Reaction score
104

Create Windows 11 bootable USB using Rufus with ISO download

To use Rufus to download the Windows 11 ISO file and create a bootable media, connect a USB flash drive with 8GB of space, and then use these steps:
  1. Open Rufus website.
  2. Under the “Download” section, click the link to download the latest version.
  3. Double-click the executable to launch the tool.
  4. Click the Settings button (third button from the left) at the bottom of the page.
    Rufus open settings
  5. Under the “Settings” section, use the “Check for updates” drop-down menu and select the Daily option.
    Rufus enable updates
  6. Click the Close button.
  7. Click the Close button again.
  8. Open Rufus again.
  9. (Optional) Under the “Device” section, use the drop-down menu and select the USB flash drive to create the installation media.
  10. Under the “Boot selection” section, use the drop-down menu and select the “Disk or ISO image” option.
  11. Click the down-arrow button (on the right side) and select the Download option.
    Rufus Windows 11 ISO download option
  12. Click the Download button.
  13. Select the Windows 11 option.
  14. Click the Continue button.
  15. Under the “Release” section, select the 22H2 option to choose Windows 11.
    Rufus Windows 11 ISO download
  16. Click the Continue button.
  17. Select the Windows 11 Home/Pro/Edu option.
  18. Click the Continue button.
  19. Select the language of Windows 11.
  20. Click the Continue button.
  21. Select the operating system architecture. (Windows 11 is only available in x64 architecture.)
  22. Click the Download button.
  23. Select the location to save the Windows 11 ISO file automatically.
  24. Under the “Image option” setting, select the “Standard Windows 11 Installation” option.
  25. (Optional) Continue with the default settings after the download.
  26. (Optional) Under the “Volume label” setting, specify a name for the drive — for example, Windows 11 Setup.
  27. Click the Start button.
  28. Clear the “Remove requirement for 4GB+ RAM, Secure Boot and TPM 2.0” option.
    Rufus user experience settings
  29. (Optional) Check the “Remove requirement for an online Microsoft account” option to be able to create a local account during the out-of-box experience (OOBE).
  30. (Optional) Check the “Create a local account with username” option and specify the account name if you want an installation with a local account instead of a Microsoft account (not recommended).
  31. (Optional) Clear the “Set regional options to the same values as this user’s” option.
  32. (Optional) Clear the “Disable data collection” option.
  33. Click the OK button.
Once you complete the steps, you can use the bootable USB flash drive to install Windows 11 using a clean or in-place upgrade installation.
 

Xploit Machine

Well-known member
Joined
Nov 29, 2022
Messages
1,244
Reaction score
104

Create Windows 11 bootable USB using Rufus with existing ISO file

To create a bootable USB with Rufus using an existing ISO file, use these steps:
  1. Under the “Download” section, click the link to download the latest version.​
  2. Double-click the rufus.4.xx.exe file to launch the tool.​
  3. Under the “Device” section, use the drop-down menu and select the USB flash drive to create the Windows 11 bootable media.​
  4. Under the “Boot selection” section, use the drop-down menu and select the “Disk or ISO image” option.​
  5. Click the Select button.​
    Rufus select Windows 11 ISO
  6. Select the Windows 11 ISO file for version 22H2 or 21H2.​
  7. Click the Open button.​
  8. Under the “Image option” setting, select the “Standard Windows 11 Installation” option.​
    Rufus Windows 11 bootable settings
  9. Under the “Partition scheme” section, select the GPT option.​
  10. Under the “Target system” section, select the UEFI (non-CSM) option.​
  11. Under the “Volume label” section, specify a descriptive name for the bootable USB drive. For example, Win11_Install_USB.​
  12. Use the default settings for the File system and Cluster size options.​
  13. Check the Quick format option.​
  14. Check the “Create extended label and icon files” option.​
  15. (Optional) Clear the “Remove requirement for 4GB+ RAM, Secure Boot and TPM 2.0” option.​
    Rufus user experience settings
  16. (Optional) Check the “Remove requirement for an online Microsoft account” option to be able to create a local account during the out-of-box experience (OOBE).​
  17. (Optional) Check the “Create a local account with username” option and specify the account name if you want an installation with a local account instead of a Microsoft account (not recommended).​
  18. (Optional) Clear the “Set regional options to the same values as this user’s” option.​
  19. (Optional) Clear the “Disable data collection” option.​
  20. Click the Start button.​
  21. Click the OK button to confirm the USB’s deletion and the bootable drive’s creation.​
After you complete the steps, the tool will begin creating a USB media with the Windows 11 installation media.
 

Xploit Machine

Well-known member
Joined
Nov 29, 2022
Messages
1,244
Reaction score
104

Create Windows 11 bootable USB for unsupported hardware using Rufus

Alternatively, Rufus has the option to create a bootable USB that bypasses the TPM 2.0, Secure Boot, and memory requirements to install Windows 11 on unsupported hardware.

To create a Windows 11 22H2 or 21H2 bootable USB for unsupported hardware, use these steps:
  1. Under the “Download” section, click the link to download the latest version.​
  2. Double-click the rufus.4.xx.exe file to launch the tool.​
  3. Under the “Device” section, use the drop-down menu and select the flash drive to create the Windows 11 bootable USB media.​
  4. Under the “Boot selection” section, use the drop-down menu and select the Disk or ISO image option.​
  5. Click the Select button.​
    Rufus select Windows 11 ISO
  6. Select the Windows 11 ISO file for version 22H2 or 21H2.​
  7. Click the Open button.​
  8. Under the “Image option” section, select the “Standard Windows 11 Installation” option.​
    Rufus Windows 11 bootable settings
  9. Under the “Partition scheme” section, select the GPT option.​
  10. Under the “Target system” section, select the UEFI (non-CSM) option.​
  11. Under the “Volume label” section, specify a descriptive name for the Windows 11 bootable USB flash drive – For example, Windows 11 Setup.​
  12. Use the default settings for the File system and Cluster size options.​
  13. Check the Quick format option.​
  14. Check the “Create extended label and icon files” option.​
  15. Click the Start button.​
  16. Check the “Remove requirement for 4GB+ RAM, Secure Boot and TPM 2.0” option to bypass the Windows 11 hardware requirements.​
    Rufus unsupported hardware option
  17. (Optional) Check the “Remove requirement for an online Microsoft account” option to be able to create a local account during the out-of-box experience (OOBE).​
  18. (Optional) Check the “Create a local account with username” option and specify the account name if you want an installation with a local account instead of a Microsoft account (not recommended).​
  19. (Optional) Clear the “Set regional options to the same values as this user’s” option.​
  20. (Optional) Clear the “Disable data collection” option.​
  21. Click the OK button.​
Once you complete the steps, Rufus will create a bootable USB media that will bypass the security and memory requirements to upgrade or install a fresh copy of Windows 11 on virtually any supported or unsupported hardware.
 

denisesmith

Member
Joined
Mar 21, 2025
Messages
5
Reaction score
0
Download & Install Rufus – Get it from rufus.ie.
Insert USB Drive – Use a minimum 8GB USB.
Open Rufus – It will auto-detect your USB.
Select Windows 11 ISO – Click SELECT and choose your ISO file.
Choose Partition Scheme – GPT (UEFI) or MBR (BIOS/Legacy).
Set File System – Use NTFS or FAT32.
Click START – Wait for the process to complete.
Done! – Eject the USB and use it for installation.
 

Ask a Question

Want to reply to this thread or ask your own question?

You'll need to choose a username for the site, which only take a couple of moments. After that, you can post your question and our members will help you out.

Ask a Question

Top